How To Photograph Yosemite When You Don't Have a Lot of Time
10 Best Photo HotSpots
WRITTEN BY: BRUCE LOVELACE
UPDATED ON: September 8 , 2024
 I climbed Half Dome!
It's an amazing place to visit, but what's the best way to photograph Yosemite National Park when your time is limited? This list of the top 10 vantage points in Yosemite Valley and FAQ section on how to best photograph Yosemite will help.
You've heard the expression, "Location, Location, Location." Well, it applies to Yosemite also. There are many great spots for photography, and for the most part, they're easy to get to.
In a second, we'll look at the best 10 spots for you to get the best views for photography when you travel through Yosemite. First, I need to make an important point. The more time you plan your strategy ahead of time, then the more likely you are to get great photographs during your travels.

If your visit to photograph the splendor of Yosemite was like mine, (not as long as you want), you're not going to have enough time to hike to all the remote locations for unique photos. You want to be efficient, see as many of the sights as you can and capture those memories with your camera.
Yosemite was first developed more than 100 years ago. The original roads were strategically routed and smartly improved to give you great vantage points that are easy to get to by car and sometimes just a short walk.
10 best Photo Spots in Yosemite
You're probably eager to find what the best locations are for the best photos of Yosemite. Here's my top 10 list based on my experience combined with the experiences of other photographers.
1. Tunnel View
"The spectacular black and white photos from Tunnel View by World famous photographer Ansel Adams were the biggest force in inspiring me to get to Yosemite and photograph this amazing place."- Bruce Lovelace
Tunnel view is likely the most iconic and most photographed view within the entire Yosemite Valley, if not one of the most frequently photographed landmarks in the entire world. From this vantage point, just in front of the tunnel entrance on Wawona Road, you can see and photograph El Capitan, the 3 Brothers rock formation, Bridalveil Falls, and Half Dome in the distance.
 Yosemite Tunnel View
A controlled burn filled the valley with smoke
The lighting was good and the clouds were decent when I took this photo from Tunnel View, but there was significant haze from a controlled burn that was being performed in the area. I did some de-haze correcting in Photoshop to improve the image contrast.
The next 3 photo opportunity locations are all accessible from driving on Glacier Point Road so you can easily photograph all three in one day.
2. Glacier Point
Glacier Point is one of the most popular stops to go to when you want a closer view of Half Dome. You can park quite close to the viewing areas. Just hope that you get interesting lighting conditions when you start pressing your shutter button.

From the Glacier Point viewing area, you can see and photograph several famous Yosemite landmarks including Nevada Falls, Vernal Falls, Clouds Rest, Half Dome, and the Yosemite Valley. Watch just 13 seconds of the video below and you'll see what's so special about taking photograph at Glacier Point
3. Taft Point
 Side view of Taft Pt.
The view of the entire Yosemite Valley from Taft Point is simply stunning.
Just how these rock formations and the path of the Merced River formed is mind-blowing.
Taft Point is just a moderate 1.1 mile hike off of parking on Glacier Point Rd. It's worth photographing as the main subject of your photograph (see my photo). Even more breathtaking is walking to Taft Point itself and photographing the Yosemite Valley and the various landmarks below.
4. Sentinel Dome
I refer to Sentinel Dome as a miniature Half Dome. It's a very similar looking geological formation as Half Dome, albeit 5 times easier to ascend than
climbing the very long and sometimes steep ascent and cables of Half
Dome. The hike to Sentinel Dome is a very similar distance from Glacier
Point Road as Taft Point is, but an even easier hike. Only the final ascent to the top of the dome is a little steep, but it's short.
 Approaching the front of Sentinel Dome
As it is with hiking to the top of Half Dome, you hike around the back side of Sentinel to get the top and be mesmerized with the awe-inspiring view.
The view is spectacular in all directions. Sentinel Dome is likely the least publicized spectacular view of the Yosemite Valley. It's the easiest hike you can take to see "miles and miles." You get many terrific photo ops, of course, depending on the direction of the light and the kind of weather you're getting.
5. Yosemite Falls
Yosemite Falls can be photographed from many different vantage points, both high and low, throughout the park because of its tremendous height. There are 3 sections of the falls, with Upper Yosemite Falls being the tallest, coming in at 1430 feet.
 Upper Yosemite Falls from the valley floor
It's one of the easiest landmarks to photograph. I took the photo above of Upper Yosemite Falls above from the valley floor, although I included it in many other photos I took from vantage points throughout the park.
6. Half dome
No photography excursion to Yosemite is complete without viewing and photographing the magnificent Half Dome. The elevation at the top of Half Dome is 5,000 feet above the Yosemite Valley floor, so it can be photographed from countless vantage points. It all depends on how you want to portray it, by itself or as part of an overall scene.

The photo above was taken of the "backside" of half Dome when I hiked it. I wanted to include it to show the unique rock formation Half Dome is.
It was a remarkably clear at that time, but changed quickly and inspired us to descend quickly before an afternoon thunderstorm.
7. Vernal and Nevada Falls
 Overwhelming Power
Vernal Falls Overlook
I put these two photo opportunities together.
If you make the effort to photograph Vernal Falls you're likely to continue on to photograph Nevada Falls too.
Vernal Falls requires just a 1.1 mile hike on the Mist Trail starting from the beginning of the trail. You can get up close and personal with the 370 foot drop and feel the strength of the pounding water flow.
It's exhilarating to just stand there and appreciate the magnitude of the force that nature has created for us to enjoy.
Nevada Falls is another 1.1 mile hike, but you'll have to endure some steep switchbacks and steps to get there. It's worth the climb, as Nevada Falls reaches almost 600 feet tall, and makes for another great subject to enjoy and photograph.
Make sure you have a ultra wide angle lens to use so that you can fit the entire falls within your composition.
8. El Capitan
The enormous unique size of El Capitan makes it a must-take photo when you're visiting Yosemite. Because it's so big and so high it can be photographed from countless angles and positions in the valley as well as the higher elevations.

El Capitan is the world's largest granite monolith if you include the 1,000 feet below ground. Choose a valley location to emphasis its incredible or shoot it from a high point to give it perspective to its surrounding geology.
9. Bridalveil Falls
Bridalveil falls is likely the most visited waterfall in the Park. It's easy to get to and you can hike up close to the bottom and feel the cool mist on your face. Although Springtime is when you'll get the most water flowing, it's also one of the very few waterfalls in Yosemite that does not dry up completely in the Summer.

I recommend you photograph Bridalveil Falls from Tunnel View with your lens zoomed to moderate telephoto. You're at a good elevation and can include Half Dome in your composition.
10. Merced River And Yosemite Valley Floor
The unique "U-Shaped" valley includes dozens of photo ops along the Northside and Southside Roads that circle the Yosemite Valley floor in addition to iconic photo ops for Bridalveil Falls, Yosemite Falls, and El Capitan.
 View of Yosemite Falls from Yosemite Valley Floor
Like the first landscape photo at the beginning of this article, the landscape photo above was taken from one of the spots on the valley floor road.
I positioned myself for this photo from the valley floor so that the
treetops poked above the cliff of Eagle Peak. Cathedral Rock, The
Chapel, and Beach can also be photographed from the valley floor.
Yosemite FAQ
Click on any of the questions below to get the answer to the question about Yosemite photography.
Do I need a permit to take photos in Yosemite?
Do I need a permit to take photos in Yosemite?
You don't need a special permit to take photos in Yosemite National Park, provided it does NOT involve advertising or promotion or the use of professional models, props or video, or a crew of assistants.
When should you photograph Yosemite?
When should you photograph Yosemite?
Yosemite is best photographed late afternoon or early morning. This includes before, during, and after sunrise and sunset. If you're facing east, sunset is generally a better time. If you're facing west, sunrise is the best time. In Winter, Spring, and Fall, you're more likely to get photos without hazy, humid skies.
What's the best location to photograph Half Dome
What's the best location to photograph Half Dome
Glacier Point is the best location to photograph Half Dome because it's close up and you're at a similar altitude. You can zoom in for a full-frame view of Half Dome or zoom out and include the vastness of the Yosemite Valley below as a great foreground to your composition.
Can I sell the pictures I take at Yosemite?
Can I sell the pictures I take at Yosemite?
You can sell the pictures that you take at Yosemite. You own them. Unite States laws give you permission to take photos in public places like Yosemite. People can be included in your photos, provided you don't falsely portray them as promoting a product or service.
Where is the best view in Yosemite?
Where is the best view in Yosemite?
The best view of Yosemite is subjective, but Glacier Point and Tunnel View can't be beat in overall magnificence. Both of these views are very easy to get to and offer a spectacular view of the most prominent landmarks in the entire Yosemite National Park area.
Where is the best place to take a picture of El Capitan?
Where is the best place to take a picture of El Capitan?
The best vantage point to photograph El Capitan is Tunnel View around sunset, although photographing El Captian from the El Capitan Meadow earlier in the day is the best way to capture its colossal size from a closer position.
What is the best place to photograph 3 brothers rock formation at Yosemite?
What is the best place to photograph 3 brothers rock formation at Yosemite?
Many photographers recommend photographing the Three Brothers rock formation at Yosemite National Park from the Merced River, at or just east of Cathedral Beach Picnic Area. You also get a great view to photograph Three Brothers when you're positioned at Tunnel View.
What lens should I bring to Yosemite?
What lens should I bring to Yosemite?
The best single lens to bring to photograph Yosemite is a zoom lens that covers both wide angle and telephoto focal lengths. This will enable you to shoot wide scenic views as well as closer detail shots of specific landmarks. The best secondary lens is an ultra wide lens for super wide and panoramic views
What are the best camera settings to use when photographing Yosemite
What are the best camera settings to use when photographing Yosemite
For wide angle photos during the day a shutter speed of 1/125 second and an aperture of f/8 will give you sharply focused photos of Yosemite with no image blur. Use a faster shutter speed like 1/250 second for telephoto shots.
What's the best time to photograph Yosemite
What's the best time to photograph Yosemite
You can get great photos of Yosemite at any time of day, but you'll get even more spectacularly lit photos when you shoot early in the day and late in the day around sunrise and sunset.
Summary
I hope you enjoyed your visit here. Yosemite can get very crowded, especially in the summer months, and the weather does not always cooperate. Just like the Grand Canon, it still endures as a great location to hike and photograph. This top ten list of easy photo ops is just my own, Yours may be different.
My visit was too short, but I was thrilled to experience and photograph what I could. I hope you're inspired too and get to photograph ALL of these breathtaking landmarks of Yosemite.

Bruce Lovelace is the publisher of TravelingPhotographer.com. Bruce shot portraits full time for over 35 years. Now he shoots more travel photography. Read more about him on the About Page. He also publishes how to articles and camera gear reviews at the Photography Tips and Canon Geek websites.
The Traveling Photographer Location on Google My Business
Return to All Travel Photography
You might like these
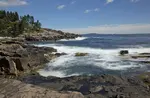
Beginner Tips For Photographing Acadia With A Cell Phone
How to get stunning images photographing Acadia with a cell phone. You need to know a few things first when taking photos with your mobile phone camera
Spectacular Iceland Landscape Photography With an iPhone-Sweet Gallery
Visit the gallery and experience the variety of photo ops avaiable through this Iceland landscape photography collection. Learn from the image critques.
From Sunrise to Sunset-My 6 year Photographic Love Affair with Acadia
Beyond the Guidebook: 6 Years of Discovering Photography Gems in Acadia National Park by The Traveling Photographer. How to photograph the magic of Acadia
Scotland Travel Photography Best Camera + Lens For Photos of Scotland
With many varied photo ops to explore in Scotland, it's vital you equip yourelf with the right Scotland travel photography gear-FAQ guide to photograph Scotland
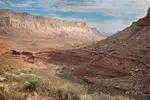
High Resolution Grand Canyon Hiking Photos. Enjoy The Free Gallery
Not from a professional photo workshop. High resolution Grand Canyon hiking photos, Mooney Falls, Havasupai creek are sure to delight you.


Return to ALL Travel Photos


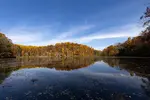
Although it's left off my top 10 list of locations to photograph at Yosemite, I couldn't resist sharing the photo of Tuolumne Meadows. There are so many many different angles you can shoot landscape photos in any direction.


© 1993-2026 All images and content are copyrighted
The Traveling Photographer - 124 Magnolia Ave. Pitman NJ 08071